IBM released a new version of the QRadar Community Edition to keep up with the commercial version. This article is not about replicating the official release announcement or the publicly available documentation, but to show the practical differences related to the latest release.
The biggest difference that now the only supported installation method is using an .ova file. And there is no other downloadable format available.
This is really handy if you going to install it on VMware, but it’s gonna be a trouble for you in any other case.
As the .ova format is just a standard tar archive, you can check what is inside:
[user ~]$ tar -tvf Downloads/QRadarCE733GA_v1_0.ova
-rw-r--r-- someone/someone 7381 2020-01-22 11:32 QCE-jan22.ovf
-rw-r--r-- someone/someone 277 2020-01-22 11:32 QCE-jan22.mf
-rw-r--r-- someone/someone 950009856 2020-01-22 11:32 QCE-jan22-file1.iso
-rw-r--r-- someone/someone 3441993728 2020-01-22 11:36 QCE-jan22-disk1.vmdk
And there is an .iso file inside…
[user ~]$ tar -xvf Downloads/QRadarCE733GA_v1_0.ova QCE-jan22-file1.iso
I was expecting to get the “real” QRadar.iso, but it was turn out that this is just a CentOS install image :)
The real QRadar .iso is “hidden” inside that .vmdk file – which gonna be the filesystem of your new VM. So, the easiest method to get that image is to deploy the downloaded .ova onto a VMware based environment, login to the new VM, and get the file you really need:
-rw-r--r--. 1 root root 2.2G Oct 31 13:50 /opt/ibm/cloud/iso/QRadarCE2019_14_0_20191031163225.GA.iso
Now you can use it as a “software install” – after you prepared the base OS on your own – as I described in my previous articles about QRadar CE.
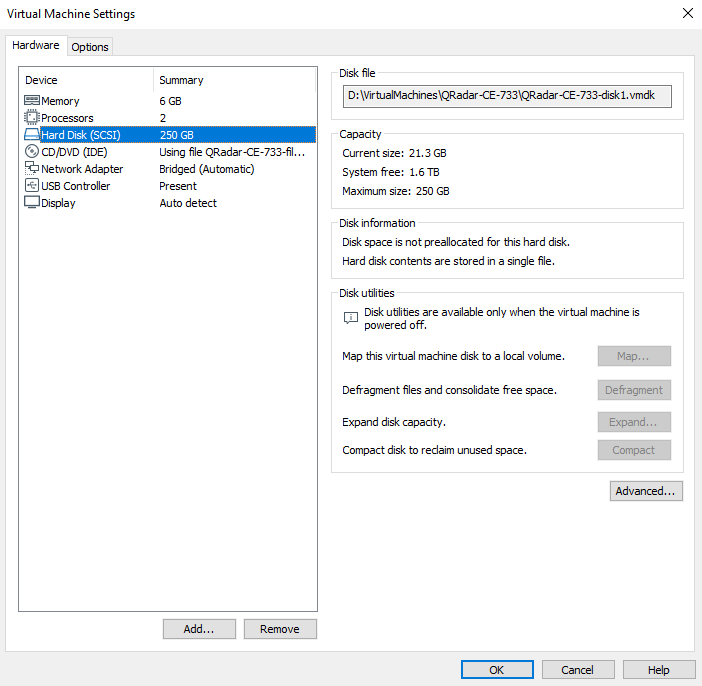
Now let’s see what we get after installing using the official way. The system requirements have been increased slightly, as the VM properties reflecting this:
As I have read the official install guide, I expected a fully prepared VM with the base OS installed…
It is close.. but still needs some manual hacking:
- You have to manually prepare the static IP and FQDN of the appliance BEFORE you start the QRadar installation. The install script will not help about this, and you will not be able to change those after you installed this version of QRadar!
- You should disable the ipv6 in general – as the install script will still fail if your VM has an ipv6 address – just as I suggested before:
# echo "net.ipv6.conf.all.disable_ipv6 = 1" >> /etc/sysctl.conf
- You should install the VMware tools manually
# yum install open-vm-tools
- Reboot the base OS after you have made these changes!
The base OS is still the CentOS 7.5.1804 – which has been hold back by a local repository:
[root@localhost ~]# yum repolist -v

Loading "fastestmirror" plugin
Config time: 0.006
Yum version: 3.4.3
Loading mirror speeds from cached hostfile
Setting up Package Sacks
pkgsack time: 0.001
Repo-id : local-centos
Repo-name : CentOSBase
Repo-revision: 1576155837
Repo-updated : Thu Dec 12 09:04:02 2019
Repo-pkgs : 745
Repo-size : 475 M
Repo-baseurl : file:///opt/ibm/cloud/packages/
Repo-expire : 21600 second(s) (last: Mon Feb 24 11:54:19 2020)
Filter : read-only:present
Repo-filename: /etc/yum.repos.d/centos.repo

repolist: 745
So you don’t have to worry about the updates – IBM will take care of those by appliance level.
The partitioning is much more simplified:
Filesystem              Size  Used   Avail Use% Mounted on
/dev/mapper/centos-root 243G  3.9G   240G  2%   /
devtmpfs                2.9G  0      2.9G  0%   /dev
tmpfs                   2.9G  0      2.9G  0%   /dev/shm
tmpfs                   2.9G  12M    2.9G  1%   /run
tmpfs                   2.9G  0      2.9G  0%   /sys/fs/cgroup
/dev/sda1               1014M 185M   830M  19%  /boot
tmpfs                   579M  0      579M  0%   /run/user/0
Simple enough, but It is clearly not for production – just like the QRadar CE itself.
Now you can start the QRadar software install by:
./setup
The setup will install a LOT of additional packages. Hope the best, and take a break. It will takes some time for sure.
If it’s finished successfully, you have to set the password for the admin account, then reboot your appliance.
Even if the OS itself will boot up very quickly, QRadar needs some time (few minutes) to start up. Be patient. The best indicator if you can access the QRadar Console via web browser:
https://<ip_address or FQDN>/console
(Yes, you will get a big fat warning because of the self signed certificate)
From this point, you have installed the 7.3.3 version of QRadar CE, start using it!
As I’m currently working for IBM, please read my disclaimer.